Blockchain Playground
As an IT Architect, part of my role is to help identify and position emerging technologies for the enterprise, which includes a focus on education. Over the past twelve months, I have seen an increased interest in blockchain, with many industry analysts positioning it as “the next big thing”.
Industry analysts are rarely the first to identify truly transformative technologies, however their marketing prioritisation is often a good indication as to when the technology has evolved from genesis to the mainstream.
Thankfully, I have kept a close eye on the blockchain community over the years, starting with my first article regarding cryptocurrency in 2011. Since that time, I have written and referenced a number of articles (see below) that further explore the technology and surrounding eco-system.
- Cryptocurrency
- 21 Million Bitcoins
- Bitcoin 101
- Blockchain
- Ethereum
- Blockchain Consensus
- Blockchain Opportunity
- Cryptocurrency Mining
Although you can learn a lot through research, I am a big believer in practical examples as a learning aid. This is especially true for a technology like blockchain, which can be very confusing.
As a result, I wanted to explore the option of creating a very simple demo, that could be used to highlight the core concepts of blockchain. This led me to the following seven requirements:
- Create Nodes
- Create Peers
- Create a Blockchain
- Mine New Blocks (Single and Batch)
- Automatically Reconcile the Blockchain
- View the Blockchain
- Proof of Work / Stake Consensus Algorithm (Stretch Goal)
Due to the obvious implementation complexities, I marked the Proof of Work / Stake Consensus Algorithm as a stretch goal. You might argue that a blockchain without a robust consensus algorithm is not really a blockchain. I would agree; however, it is important to recognise that this demo has been designed for education purposes only, with the goal to highlight the key concepts.
Like any lazy developer, I first searched GitHub for an open-source project that I could use as a foundation. This steered me towards “naivechain”, which provided the perfect starting point. My forked version of the code is called “BlockchainPlayground” and is available publicly on GitHub.
Blockchain Playground
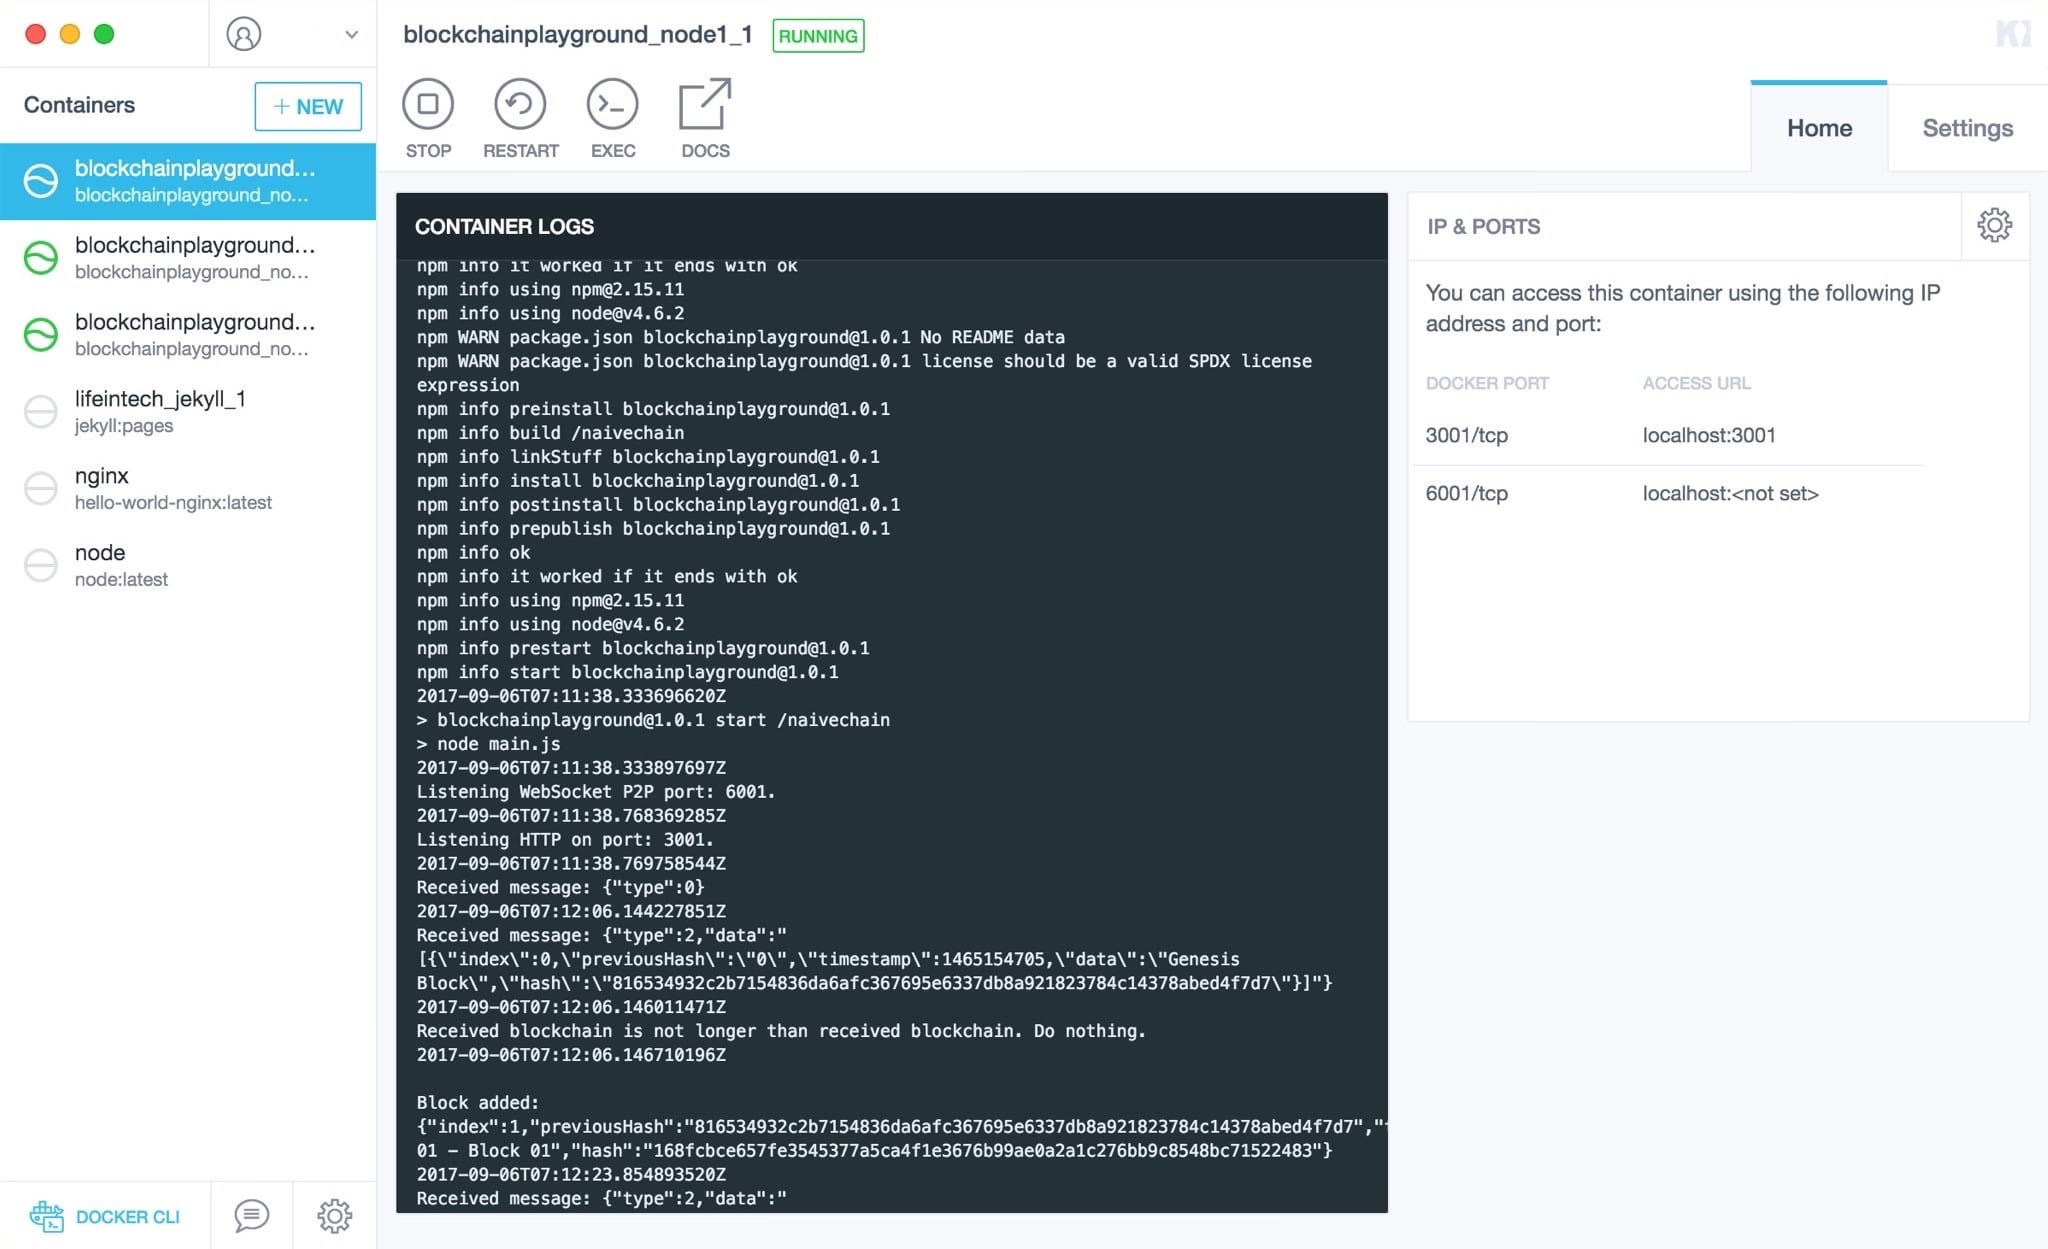
Blockchain Playground is a simple JavaScript application, which leverages Docker. By running docker-compose up the application will build and launch three nodes, as well as setup the required peers. The image below shows the nodes running in Kitematic (Docker GUI).

Once running, the nodes communicate with each other (peer-to-peer) via WebSockets, looking to reconcile the distributed ledger (e.g. Blockchain). Each node can be controlled using a simple HTTP interface (e.g. cURL), where a user can mine new blocks, add peers and report on the status of the Blockchain.
The structure of the generated block is relatively basic, which includes the values:
class Block {
    constructor(index, previousHash, timestamp, data, hash) {
        this.index = index;
        this.previousHash = previousHash.toString();
        this.timestamp = timestamp;
        this.data = data;
        this.hash = hash.toString();
    }
}
A SHA-256 cryptographic algorithm is used to generate the new hash from the contents of the block.
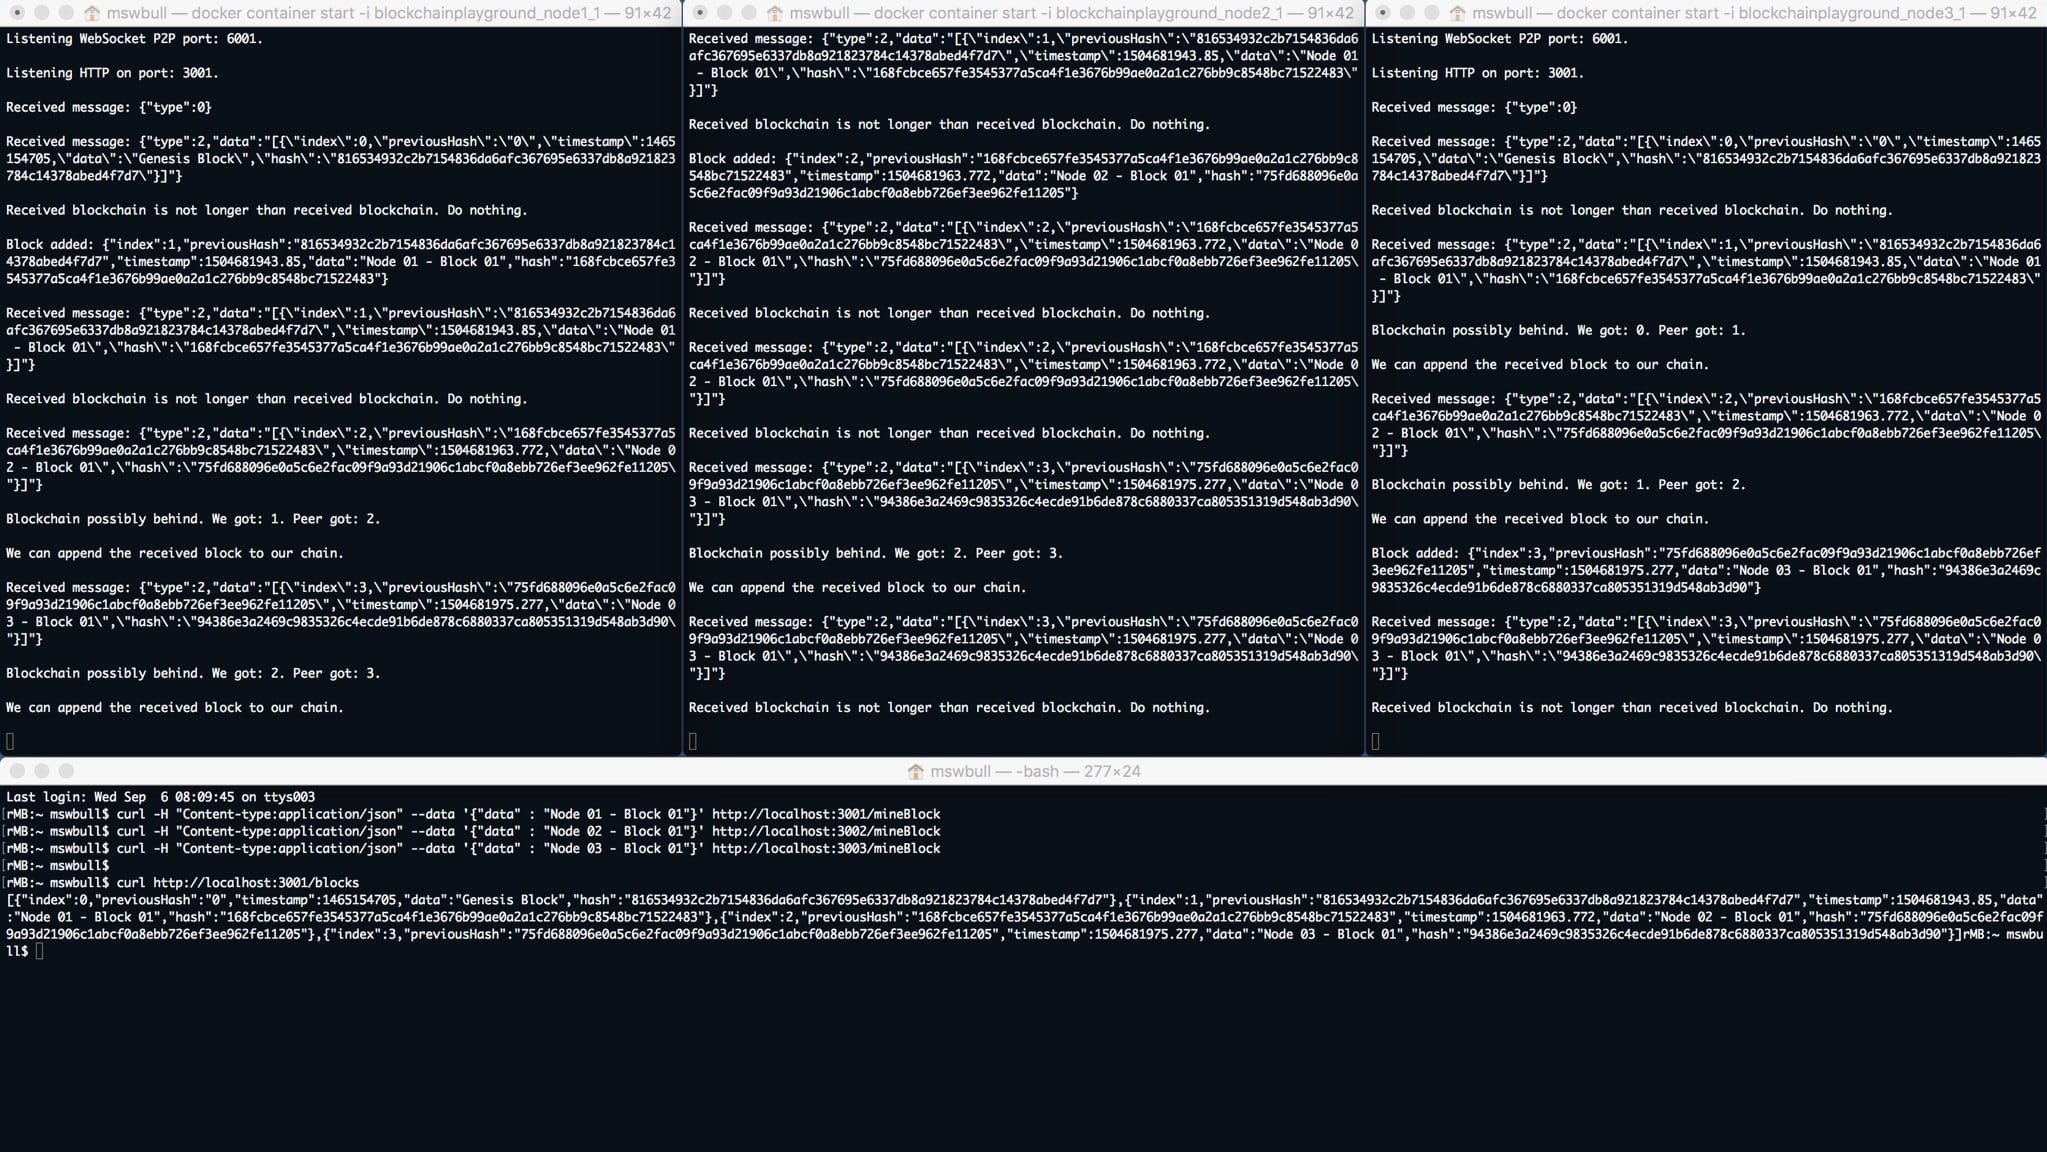
The image below highlights three terminals which are actively monitoring the running nodes. The forth terminal is used to interact with the specific nodes via HTTP.

The blockchain itself is not persisted, instead it is stored in a JavaScript array. This is useful for demo purposes, as no clean-up activities are required (simply restart the Docker containers).
Demonstration
I have found the most effective way to deliver the demo is to incorporate it as part of a broader presentation. For example, I usually describe the core concepts of blockchain, before leveraging the demo as a learning aid to “make it real” and reinforce the key messages.
The demo itself rarely lasts longer than ten minutes, following the high-level script outlined below:
- Launch node one.
- Review the status of the ledger from node one, revealing the “Genesis Block”.
- Mine a new block from node one.
- Review the status of the ledger from node one, revealing the full chain.
- Launch node two.
- Watch the nodes connect and reconcile the public ledger.
- Review the status of the ledger from node two, revealing the full chain.
- Mine a new block from node two.
- Watch the nodes connect and reconcile the public ledger.
- Review the status of the ledger from node one, revealing the full chain.
NOTE: It is obviously possible to continue to create additional nodes and mine new blocks, as well as manually create specific peers.
I have also linked below a (very rough) video walkthrough of the demo in action, however please note that this does not include the previously mentioned presentation.
Conclusion
In summary, I believe this demo, alongside appropriate framing material, can be a useful blockchain education tool. Knowing the technology is still relatively immature, it will likely take many more years before it is “second nature” to technologists, however I believe finding tangible ways to demonstrate the technology, will help to accelerate the learning.