Root Galaxy Nexus
This is a quick seven step guide explaining how to root a Samsung Galaxy Nexus running Android v4.2.2 (Jelly Bean). The instructions were created using a Mac, running OS X 10.8.
NOTE: This process will automatically complete a factory reset of the Galaxy Nexus, resulting in a loss of all data. Please complete a full backup before proceeding.
Step One: Download and unzip the “GalaxyNexusRoot.zip”.
Step Two: On your Galaxy Nexus, enable USB debugging from Settings > Developer Options. The developer options are now hidden by default, but can be enabled by selecting Settings > About Phone and tapping the Build Number seven times (yes, you read that correctly).
Step Three: Power down the Galaxy Nexus and restart it by holding volume up, volume down and the power button simultaneously. Keep holding until the the device powers into “fastboot” mode (signified by by Android robot with its stomach open).
Step Four: Connect the Galaxy Nexus to your Mac via USB and open Terminal (Applications > Terminal).
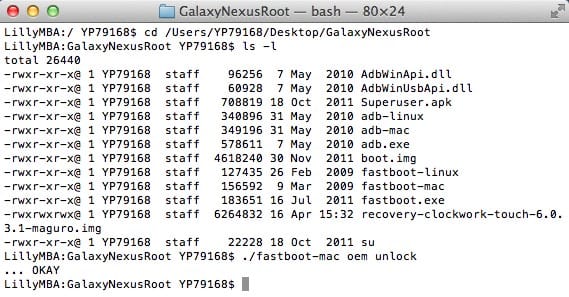
Step Five: Navigate to the unzipped GalaxyNexusRoot folder and run the command ./fastboot-mac oem unlock (as shown in the screenshot below).

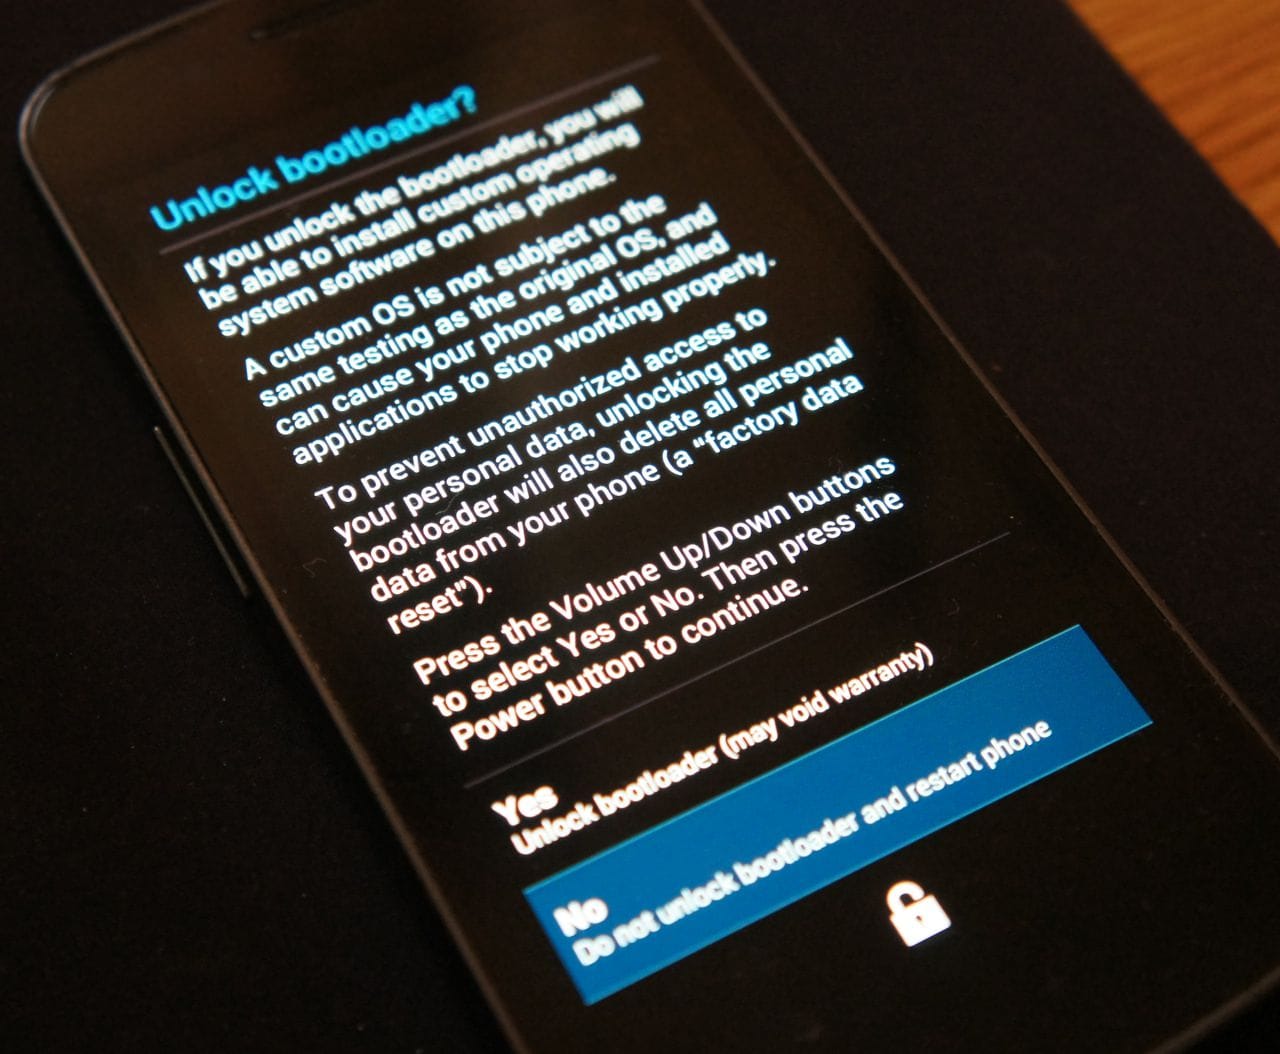
Step Six: The Galaxy Nexus should now prompt you to unlock the bootloader. Select Yes to proceed.

Step Seven: Finally, return to the terminal prompt and type the command ./fastboot-mac boot boot.img (as shown in the image below). This will install the SuperUser app allowing you to manage superuser rights (if required).

Step Eight: That’s it! Your Galaxy Nexus will now reboot (multiple times) with full root access enabled. Enjoy!