Next PC - Ivy Bridge
Once every few years I give my primary Windows PC a full overhaul. The last time I completed this process was in July 2006, where I was lucky enough to receive an engineering sample of Intel’s legendary “Conroe” architecture. It’s now nearly six years later and although my system has had a number of incremental upgrades (memory and graphics) the primary architecture has remained the same, based around Intel’s 975X chipset and a Core 2 Duo E6700ES.
Like any hardware enthusiast, I enjoy the process of designing and building a new system, especially the challenge of overclocking. I have never documented a build before, but thought the information I gather could prove useful to others and therefore I plan to write a number articles, starting with the design, followed by the build and finally the overclock configuration. So let’s get started…
Current System
Before starting a new build it’s important to benchmark your current system, this helps get a baseline that can be used later to measure your new systems performance. My current systems specification can be found below:
- ASUS P5W DH Deluxe Motherboard (Intel 975x Chipset)
- Intel Core 2 Duo E6700ES @ 3.0GHz + Scythe Ninja
- 6GB DDR2 Corsair Memory (PC2-6400, 4-4-4-12)
- AMD Radeon HD 5850 1GB GDDR5
- Creative Sound Blaster Recon3D PCI-E
- Intel X25-M (G2) 160GB SSD
- Plextor PX-755A DVD+-RW (SATA)
- OCZ ModXStream Pro 700w Modular PSU
- Lian Li V1000 Case
- Microsoft 3000 V2 Keyboard and Logitech Nano VX Mouse
- LG 22” L226WTQ Display (1680x1050)
As you can see from the above specification, my current system still holds its own. I am able to play the majority of modern games set to “medium” or “high” at the monitors native resolution, with acceptable frame rates. For example, Skyrim with the High Resolution Texture Pack installed is perfectly playable at “High” settings with 4x Antialiasing and 8x Anisotropic Filtering. This is obviously helped a lot by the AMD Radeon 5850, but it’s still not bad for a dual core processor that was released in 2006.
So let’s get some benchmark results:
- Windows Experience Score = 6.4
- 3DMARK 11 = P3018
- PCMARK 7 = 3067
- SuperPi (32M) = 18m 34s
- CrystalDiskMark Seq Read / Seq Write = 264.3MBs / 111.9MBs
These numbers will be used as a baseline to calculate the performance increase of the new system.
Future System
The specification below outlines my new system, it is based around Intel’s next generation architecture, known as Ivy Bridge. The items marked with a star are new, with all other components being recycled from my current system.
- MSI Z77A-GD65 (Intel Z77 Chipset)
- Intel Core i5 3570K + Noctua NH-D14
- 16GB DDR3 Samsung Green (PC3-12800C11, 30nm)
- Sapphire HD 7950 OC 3072MB GDDR5
- Creative Sound Blaster Recon3D PCI-E
- 2x Intel X25-M (G2) 160GB SSD (RAID 0)
- Samsung SH-B123L/BSBP Blu-Ray
- OCZ ModXStream Pro 700w Modular PSU
- Lian Li V1000 Case
- Logitech Solar Keyboard K750 and Logitech M705 Mouse
- Samsung S27A950D 27” 120Hz 3D (1920x1080)
So why have I made these choices? Let’s jump into the details of the key components:
Motherboard:
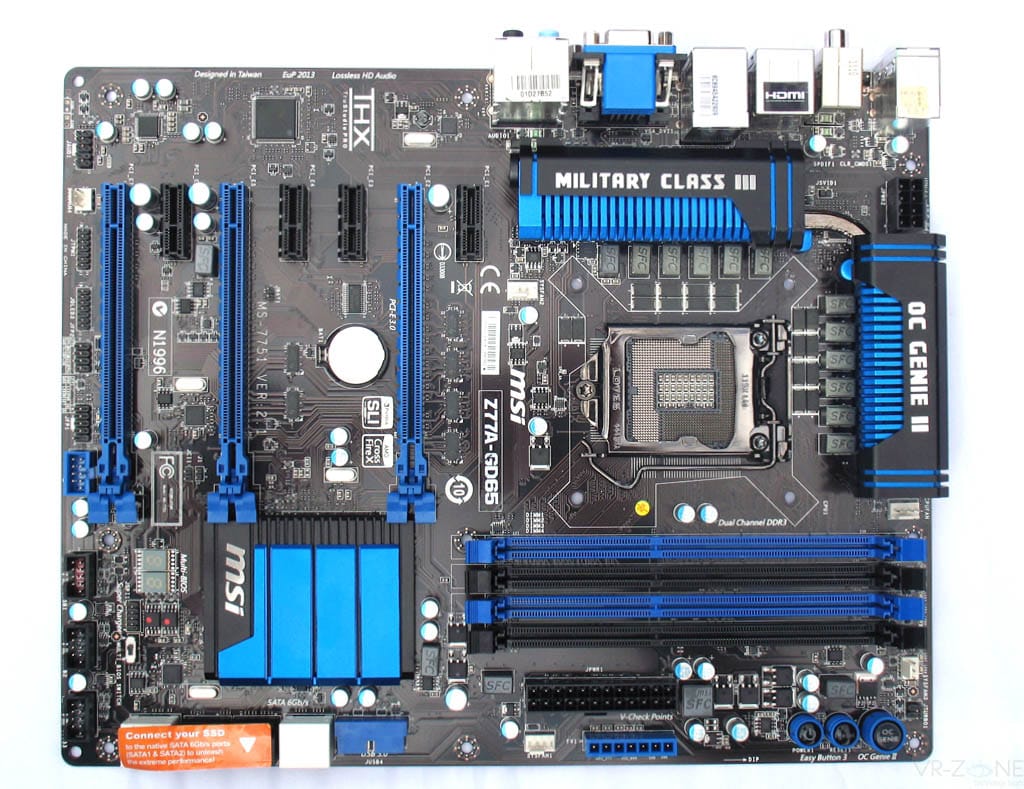
As with all computer components (especially first generation parts) there is often not a lot to differentiate between the different vendors. This is the case with Intel’s latest Z77 chipset, where all the main vendors have a full range of boards, of which any one would likely meet your needs. Personally I have chosen the MSI Z77A-GD65, which is their current flagship Z77 motherboard. It includes all the expected “bells and whistles”, for example native USB 3.0 support, PCI Express 3.0 (3x PCI-E 16x) as well as MSI’s Military Class components, which is their guarantee of stability and long life. The motherboard can be seen below:

The MSI Z77 board may not be the fastest on the market (only 1% or so behind the Asus Z77 boards), but in my opinion it is important to balance performance with stability, as the motherboard is the backbone of the entire system and anyone that has ever worked with an unstable board will know that it can be very frustrating when attempting to achieve a maximum stable overclock.
Processor:
There has been a lot of talk on the Internet comparing Intel’s older Sandy Bridge architecture to their new Ivy Bridge architecture. The primary differences between the two are that Ivy Bridge is built around the 22nm fabrication process and includes enhanced integrated graphics (HD4000) and PCI Express 3.0 support. The downside is that due to the maturity of Sandy Bridge, early signs show that the older chip overclockers better, with the current fan favourite (Intel Core i5 2500K) easily achieving 4.8GHz on air.
Considering I will be using a single dedicated graphics card it is likely that the improved integrated graphics and PCI Express 3.0 will offer little, to no advantage (as a current generation dedicated graphics card would not be bandwidth limited by PCI Express 2.0). However, as I plan to build a system that will see me through the best part of five years, I want to ensure my future options are open, as well as the fact I like a good challenge and am keen to see what I can get out of Intel’s latest and greatest architecture. As a result I went with the likely 2500K replacement, the Intel Core i5 3750K, clocked at 3.8GHz (stock). It’s important to note that the “K” signifies that the chip is multiplier unlocked, therefore providing easy access to overclocking.
Although this is my choice, it should be noted that if you are looking for the maximum RAW MHz today, then I suggest you continue to look at the older Sandy Bridge architecture, specifically the Intel Core i5 2500K. At least until the Ivy Bridge manufacturing process has matured.
For more details of the Intel i5 3750K attached tot he MSI Z77A GD65 I recommend you check out the Vortex review.
Memory:
When it comes to memory there is currently only one choice, not Corsair, or Crucial, it’s Samsung! The Samsung Green memory is simply outstanding, delivering the first memory modules to utilise a 30nm process that results in 1600MHz DDR3 at an insanely low 1.25v (compared to the industry standard 1.65v). What this means is that the Samsung memory has crazy overclocking potential, with the community easily hitting 2400MHz (11-11-11-28 2N) at just 1.50v.
The other great thing is that because these chips use the 30nm process they are both tiny (half the size of standard memory) which is great for systems with large CPU coolers and cheaper, where you can currently get 16GB for just £70!
Although you could argue that anything above 16000MHz is a waste and I personally still believe 8GB is the sweet spot for consumer systems, however with this incredible overclocking potential and knowing that memory prices can fluctuate a lot, I recommend grabbing 16GB immediately.
Graphics:
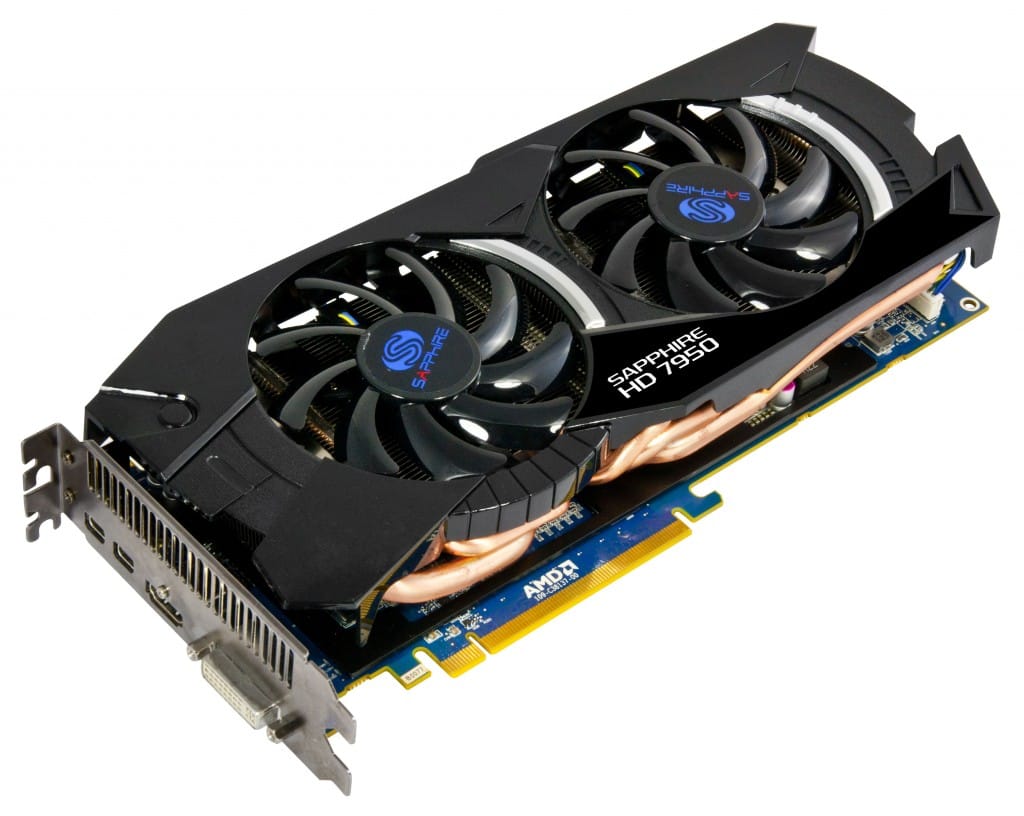
This is always a tough one, do you go NVIDIA or AMD? Generally this comes back to personal preference and sometimes loyalty (although I have used cards from both manufactures in the past). As it stands today the NVIDIA GeForce 680 holds the performance crown (until tomorrow when NVIDIA will likely announce the GeForce 690). Unfortunately the GeForce 680 does not come cheap (£450+), therefore I am looking for a card that is still high end, has plenty of overclocking potential, but can be picked up for around £300. This led me to the AMD 7950 overlcocked edition from Sapphire. In my opinion this is the current king of overclocking, with a chip that is essentially identical to the 7970 (AMD’s flagship), including the same GPU and 3GB GDDR5 memory (384 bit memory width). The only difference between the two are the clock speeds and the 7950 has less “Stream Processors” enabled.
However, it is with Sapphires custom dual fan cooler (which is also very quite) where the magic happens as this card can easily surpass a stock 7970 with a simple overclock, which puts it in the same ballpark as the NVIDIA 680 when looking at real world results. Not bad for a £150+ saving (which essentially pays for the processor). The Sapphire HD 7950 OC can be seen below:

I recommend you check out the Anandtech review for more details.
Storage:
The final upgrade is storage, where for obvious reasons (check my previous article) I will be sticking with Solid State Storage. However this time I will be installing two Intel X25M G2 Solid State Drives running in RAID 0. To be honest this is a bit of an experiment. The reason I am going RAID is that I happen to have two identical Intel drives recycled from other systems. Although RAID 0 should theoretically offer better performance, unfortunately TRIM is not currently supported by this type of setup, therefore although the drives will start fast (very fast) the performance could degrade over time. A lot of this will depend on how well the Intel controllers do with their garbage collection (an unknown at this point). As a result I plan to start in RAID 0 and if performance becomes unacceptable I will switch to a simple JBOD configuration.
Conclusion:
That’s it! That’s my new system. I have already placed the order and am simply waiting for delivery. As soon as it all arrives (expected on Wednesday) I will post a follow-up article outlining the build process.